Embarking on the journey of indoor seed starting is an exciting venture for any gardening enthusiast. It allows you to get a head start on the growing season, giving your favorite flowers, veggies, and herbs the best possible start in life. In this step - by - step guide, we'll explore everything you need to know to sprout your plants like a professional gardener.
First and foremost, you need to gather the necessary supplies. These include seed trays or pots, high - quality seed starting mix, seeds of your choice, labels, and a watering can or spray bottle. The seed trays or pots should have drainage holes to prevent waterlogging, which can lead to root rot. The seed starting mix is crucial as it provides the right balance of nutrients and aeration for the young seedlings. Make sure to choose a mix that is specifically formulated for starting seeds.
When selecting your seeds, consider the climate in your area and the amount of sunlight your garden receives. Some plants, like tomatoes and peppers, require a long growing season and plenty of sunlight. Others, such as lettuce and spinach, can tolerate cooler temperatures and partial shade. Read the seed packets carefully to understand the specific requirements of each plant.
Once you have your supplies and seeds, it's time to prepare the seed starting mix. Moisten the mix with water until it is evenly damp but not soggy. Fill the seed trays or pots with the moistened mix, leaving about a quarter - inch of space at the top. Gently press the mix down to ensure good contact with the bottom of the container.
Now, it's time to sow the seeds. Follow the instructions on the seed packet regarding the depth and spacing of the seeds. Some seeds, like lettuce, should be sprinkled on the surface of the soil and lightly pressed in, while others, like beans, need to be planted deeper. After sowing the seeds, cover them with a thin layer of the seed starting mix. Use the labels to mark each tray or pot with the name of the plant and the date of sowing.
Watering is a critical step in the seed starting process. Use a watering can with a fine rose or a spray bottle to moisten the soil gently. Avoid over - watering, as this can cause the seeds to rot. Keep the soil consistently moist but not wet. You can cover the seed trays with a plastic dome or plastic wrap to help retain moisture, but make sure to remove it once the seeds start to germinate.
Temperature and light are also essential factors for successful seed starting. Most seeds germinate best at temperatures between 65°F and 75°F (18°C - 24°C). You can use a heating mat to maintain a consistent temperature if necessary. Once the seeds have germinated, they need plenty of light. Place the trays near a south - facing window or use grow lights. If using grow lights, keep them about 2 - 3 inches above the seedlings and adjust the height as the plants grow.
As the seedlings grow, they will need to be thinned out. This means removing the weaker seedlings to give the stronger ones more space to grow. Use a pair of scissors to snip off the unwanted seedlings at the soil level. Thinning is important to prevent overcrowding, which can lead to poor growth and disease.
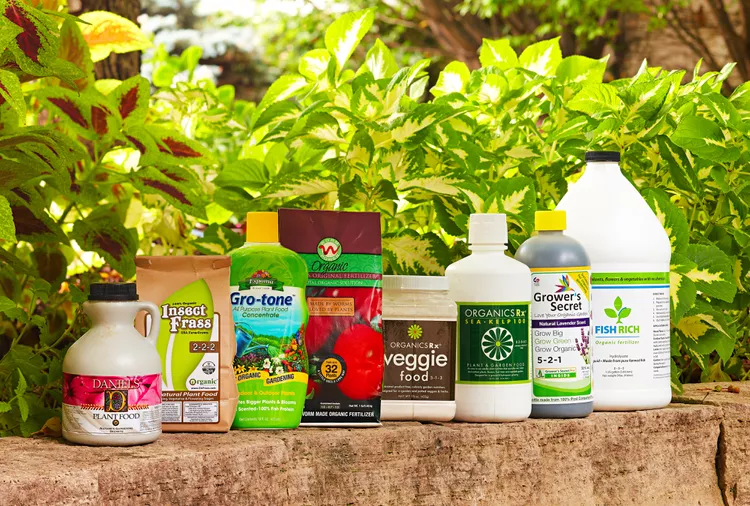
Fertilizing the seedlings is another important step. Once the seedlings have developed their first true leaves, you can start feeding them with a diluted liquid fertilizer. Follow the instructions on the fertilizer package for the correct dosage and frequency of application.
Before transplanting the seedlings outdoors, they need to be hardened off. This involves gradually exposing them to the outdoor environment over a period of 7 - 10 days. Start by placing the seedlings outside in a sheltered location for a few hours each day, gradually increasing the time and the amount of sunlight they receive. This helps the seedlings adjust to the changes in temperature, light, and wind.
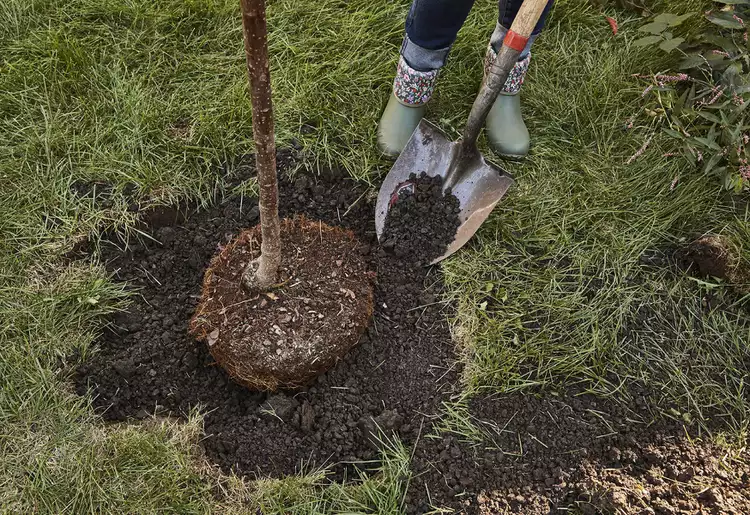
Finally, when the seedlings are strong enough and the weather is suitable, it's time to transplant them into your garden. Dig a hole in the garden bed that is slightly larger than the root ball of the seedling. Gently remove the seedling from the tray or pot and place it in the hole. Fill in the hole with soil and gently press the soil around the base of the plant. Water the transplanted seedlings thoroughly.
In conclusion, starting seeds indoors is a rewarding process that allows you to have more control over the growth of your plants. By following these steps, you can sprout your favorite flowers, veggies, and herbs like a pro. With a little patience and care, you'll be enjoying a bountiful garden in no time.
New